![15 Claude Code Productivity Tips That Transform Your Daily Workflow [2026]](https://devgent.org/wp-content/uploads/2026/03/claude-code-efficiency-eyecatch.webp)
📅 Last updated: June 2026
📑Table of Contents
- 15 Productivity Techniques — Quick Reference
- Know Your Config Files — The Foundation
- Technique 1 — Persist Project Rules in CLAUDE.md ⭐ Basic
- Technique 2 — Set Up Safe Auto-Allow with Permissions ⭐ Basic
- Technique 3 — Automate Quality Checks with Hooks ⭐⭐ Intermediate
- Technique 4 — Start with Plan Mode Before Writing Code ⭐ Basic
- Technique 5 — Iterate Safely with Fork & Rewind ⭐ Basic
- Technique 6 — Manage Context with /compact and /context ⭐ Basic
- Technique 7 — Run Parallel Research with Sub-Agents ⭐⭐ Intermediate
- Technique 8 — Run Routine Tasks with Custom Commands ⭐⭐ Intermediate
- Technique 9 — Automate Complex Workflows with Custom Skills ⭐⭐ Intermediate
- Technique 10 — Optimize Cost with Model Switching ⭐ Basic
- Technique 11 — Pause & Resume with Session Management ⭐ Basic
- Technique 12 — Share Files Instantly with @ References ⭐ Basic
- Technique 13 — Experiment Safely with Worktrees ⭐⭐⭐ Advanced
- Technique 14 — Integrate into CI/CD with Headless Mode ⭐⭐⭐ Advanced
- Technique 15 — Large-Scale Refactoring with /batch ⭐⭐⭐ Advanced
- Editor + CLI Agent Combo — My Actual Setup
- Bonus — Handy Tips and Shortcuts
- Adoption Roadmap — Where to Start
- FAQ — Claude Code Efficiency
- Related articles
- Wrapping Up
Claude Code keeps adding features at a rapid pace, and honestly, it’s getting hard to keep track of what’s effective for which use case. That’s exactly why I put together this guide — organizing 15 proven Claude Code Efficiency techniques by the specific problems they solve.
My recommendation: start with CLAUDE.md and work your way up to mastering Skills. If any configuration feels overwhelming, try building it conversationally with AI — it’s surprisingly effective. Each technique is tagged with a difficulty level: ⭐ Basic / ⭐⭐ Intermediate / ⭐⭐⭐ Advanced.
🏆 Why This Guide Is Different
Most articles on Claude Code Efficiency stop at 2–5 surface-level tips with no real configuration examples, no actual cost numbers, and no failure stories. This guide is based on my day-to-day workflow running Claude Code on the Max 20x plan ($200/month) for 6+ hours a day, with Opus 4.8 as my daily driver and 1M+ tokens of context routinely consumed per session.
I switched to Claude Code from Devin Desktop (formerly Windsurf) the moment its agent accuracy clearly overtook Cascade, and I’ve been using it as my primary coding agent ever since. What used to take me months of development now ships in weeks — that’s the bar this article is built around.
Each technique is tagged with a difficulty level: ⭐ Basic / ⭐⭐ Intermediate / ⭐⭐⭐ Advanced. For security-related best practices, check out our companion article: Claude Code Security Settings Guide.
📊 How each technique is scored
- Problem solved — the concrete pain each technique addresses
- Setup time — roughly how long it takes to get running
- Difficulty — ⭐ Basic / ⭐⭐ Intermediate / ⭐⭐⭐ Advanced
- My measured impact — what actually changed in my workflow
15 Productivity Techniques — Quick Reference
Before we dive in, here’s a bird’s-eye view of every technique covered in this article. Bookmark this table and come back whenever you need a refresher.
| # | Problem | Solution | Level |
|---|---|---|---|
| 1 | Repeating the same rules every session | Persist rules in CLAUDE.md | ⭐ Basic |
| 2 | Constant “Allow?” prompts interrupting flow | Set up auto-allow with Permissions | ⭐ Basic |
| 3 | Running lint/format manually every time | Automate quality checks with Hooks | ⭐⭐ Intermediate |
| 4 | Jumping into code without a plan | Start with Plan mode | ⭐ Basic |
| 5 | Starting over when things go wrong | Use Fork / Rewind to iterate safely | ⭐ Basic |
| 6 | Context window fills up too fast | Save context with /compact | ⭐ Basic |
| 7 | Codebase exploration takes forever | Delegate to sub-agents for parallel research | ⭐⭐ Intermediate |
| 8 | Typing the same prompts repeatedly | Run routine tasks with Custom Commands | ⭐⭐ Intermediate |
| 9 | Complex multi-step workflows need manual guidance | Automate with Custom Skills | ⭐⭐ Intermediate |
| 10 | Opus is great but expensive | Optimize cost with model switching | ⭐ Basic |
| 11 | Can’t pick up where you left off | Manage sessions for pause & resume | ⭐ Basic |
| 12 | Typing file paths is tedious | Share files instantly with @ references | ⭐ Basic |
| 13 | Experimental changes polluting main branch | Experiment safely with Worktrees | ⭐⭐⭐ Advanced |
| 14 | Can only use Claude Code interactively | Integrate into CI/CD with headless mode | ⭐⭐⭐ Advanced |
| 15 | Bulk changes across dozens of files | Large-scale refactoring with /batch | ⭐⭐⭐ Advanced |
Know Your Config Files — The Foundation
Most of the techniques in this article involve editing configuration files. Before we get started, let’s map out where everything lives and what each file controls.
| File | Purpose |
|---|---|
~/.claude/settings.json |
User settings (global, applies to all projects) |
<project>/.claude/settings.json |
Project settings (committed to Git, shared with team) |
<project>/.claude/settings.local.json |
Local overrides (.gitignored, personal preferences) |
<project>/CLAUDE.md |
Project-level AI instruction file |
~/.claude/CLAUDE.md |
User-level AI instruction file (applies globally) |
<project>/.claude/commands/<name>.md |
Custom slash commands |
<project>/.claude/skills/<name>/SKILL.md |
Custom skills |
<project>/.claude/agents/<name>.md |
Custom sub-agents |
~/.claude/keybindings.json |
Custom key bindings |
With this mental map in place, let’s jump into the techniques.
Technique 1 — Persist Project Rules in CLAUDE.md ⭐ Basic
Config file: <project>/CLAUDE.md or <project>/.claude/CLAUDE.md
Stop telling Claude “use Jest for tests” and “write commit messages in English” at the start of every session. Put it in CLAUDE.md once, and Claude will load it automatically every time.
CLAUDE.md Hierarchy & Load Order
Claude Code reads instruction files from multiple locations, layered from broadest to most specific scope:
| Scope | Location | Notes |
|---|---|---|
| Managed policy | /Library/Application Support/ClaudeCode/CLAUDE.md (macOS) |
Organization-wide rules |
| User | ~/.claude/CLAUDE.md |
Personal defaults across all projects |
| Project | ./CLAUDE.md or ./.claude/CLAUDE.md |
Project-specific rules |
| Subdirectory | ./src/CLAUDE.md etc. |
Lazy-loaded when Claude reads files in that directory |
| Modular rules | .claude/rules/*.md |
Scoped rules with paths: frontmatter |
Tips for an Effective CLAUDE.md
- Aim for ~200 lines in the base file — that’s a guideline to keep the always-loaded portion from eating context. If you need more, split into
.claude/rules/or Skills. My own base CLAUDE.md stays lean while the total across modular files routinely reaches several hundred lines. - Include coding standards, test policies, commit message conventions, and project-specific rules
- Use
@path/to/fileto import external files (up to 5 hops deep) - Move specialized instructions into
.claude/rules/and usepaths:to scope them to specific files
Auto-Generate with /init
Don’t want to start from scratch? Run claude /init and Claude will analyze your codebase and generate a CLAUDE.md template. Here’s what Claude actually inspects:
package.json/pyproject.toml/Cargo.tomletc. — identifies language, framework, and build scripts- Top-level directory layout (
src/,tests/,docs/) — captures the architecture at a glance - Test framework config (Jest, Vitest, PyTest, etc.)
- Lint / format tools (
.eslintrc,ruff.toml,rustfmt.toml) - Existing
README.md/CONTRIBUTING.md— pulls in cultural conventions
Claude then generates a CLAUDE.md with sections like project overview, tech stack, build commands, test commands, and coding conventions. Customize from there.
# Analyze the codebase and generate a CLAUDE.md template
claude /init

# Review and customize the generated file
code CLAUDE.md
How It Compares to .cursorrules, Windsurf Rules, and Copilot Instructions
If you’re coming from another AI editor, here’s how Claude Code’s CLAUDE.md stacks up against the equivalents in Cursor, Windsurf, and GitHub Copilot.
| Tool | File | Notes |
|---|---|---|
| Claude Code | CLAUDE.md + .claude/rules/*.md |
Hierarchical loading, paths: scoping, @import chains, lazy subdirectory loading |
| Cursor | .cursor/rules/*.mdc (formerly .cursorrules) |
Glob-based rule targeting, manual or auto-trigger per rule |
| Windsurf | .windsurf/rules/*.md |
Similar scoping to Cursor, plus global_rules.md for user-level rules |
| GitHub Copilot | .github/copilot-instructions.md |
Single file only, no scoping or imports — the weakest of the four |
In my experience, CLAUDE.md’s hierarchy + paths: scoping make it the most flexible of the bunch. Large projects can stay organized without bloating a single rules file.
Should You Commit CLAUDE.md to Git?
Yes, commit it. CLAUDE.md is a team asset — treating it that way compounds its value.
✅ Commit
- Project
CLAUDE.md .claude/rules/*.md(shared modular rules).claude/commands/*.mdand.claude/skills/*/SKILL.md.claude/settings.json(team-standard permissions & hooks)
🚫 .gitignore
- Personal API keys and credentials
.claude/settings.local.json(per-developer overrides)- Personal
~/.claude/CLAUDE.md(already outside the repo) - Auto Memory content (individual session learning)
CLAUDE.md Anti-Patterns
My CLAUDE.md files routinely grow to several hundred lines, and I’ve learned the hard way what not to do:
⚠️ Common mistakes
- Running
/initonce and leaving the template untouched — nothing actually gets learned - Letting the file grow past ~200 lines — it starts eating context, and important instructions get buried
- Mixing coding standards with session learnings — permanent rules and transient notes don’t belong in the same file
- Piling up “always do X” instructions — Claude doesn’t guarantee it reads every line. Move strict constraints into
.claude/rules/withpaths:scoping for reliability
💡 My workflow
Once a CLAUDE.md starts to feel bloated, I split it into .claude/rules/ files or turn workflow-specific sections into Skills so they only load on demand. The mental model is: “what must always be in context” vs. “what can be loaded when needed.” I used to include rules like “respond in English” — but if your CLAUDE.md is already written in English, Claude mirrors it automatically, so those lines are now gone.
💡 Measured impact: Once CLAUDE.md is in place, the “let me explain this project first…” preamble at the start of every session disappears entirely. That’s roughly 10–15 minutes saved per day for me.
Auto Memory — Let Claude Remember for You
Enable Auto Memory with /memory and Claude will persist information between sessions. Just say “remember this” during a conversation, and Claude stores it in ~/.claude/projects/<project>/memory/MEMORY.md. The first 200 lines are loaded at every session start.
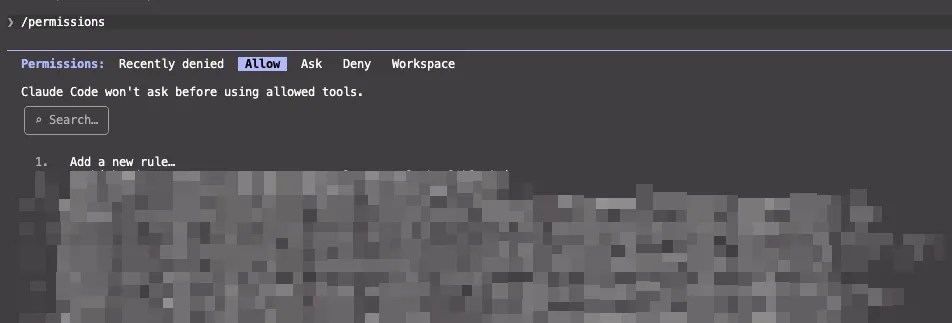
Technique 2 — Set Up Safe Auto-Allow with Permissions ⭐ Basic
Config file: ~/.claude/settings.json or <project>/.claude/settings.json
Safe commands like tests, linting, and git status shouldn’t require manual approval every time. Pre-approve them and keep your flow state intact.
💡 My personal rule of thumb
I auto-allow every read-only command — ls, cat, git status, git diff, git log, and similar. Writes stay manual because they usually need judgment. On top of that, I lock down dangerous commands (rm -rf, force pushes) in deny first, then flip into auto-approve mode with Shift+Tab when I need momentum. That one rule alone eliminates almost all of the “press Enter to allow” tax.
Recommended Auto-Allow Configuration
{
  "permissions": {
    "allow": [
      "Bash(npm run lint)",
      "Bash(npm run test *)",
      "Bash(npm run build)",
      "Bash(npx tsc --noEmit)",
      "Bash(git status)",
      "Bash(git diff *)",
      "Bash(git log *)",
      "Bash(git branch *)",
      "Bash(ls *)"
    ]
  }
}
Key points about permission patterns
- Patterns use glob notation:
*matches any arguments denyrules always take priority overallow— the system fails safe
Switching Permission Modes
Press Shift+Tab to cycle through Claude Code’s permission modes. The officially supported modes are:
- Normal (default) — asks for approval on every tool call individually
acceptEdits— auto-approves file edits (Edit / Write) but still prompts for shells and other tools. The practical “trusted task” middle groundplan— read-only, perfect for investigation (see Technique 4)bypassPermissions— skips all permission prompts entirely. Extremely powerful and best reserved for verified automation or CI pipelines where you’ve already audited the workflow
A quick but important note: “auto-approve” is not a single mode. acceptEdits and bypassPermissions are different things — stick to acceptEdits for day-to-day work and keep bypassPermissions scoped to situations where you fully understand the blast radius.
Technique 3 — Automate Quality Checks with Hooks ⭐⭐ Intermediate
Config file: settings.json (hooks key) + scripts in .claude/hooks/
Instead of saying “run the linter” after every edit, configure hooks to do it automatically. Claude can lint, format, and run tests on every file change without you lifting a finger.
Auto-Lint After Every Edit
{
  "hooks": {
    "PostToolUse": [
      {
        "matcher": "Edit|Write",
        "hooks": [
          {
            "type": "command",
            "command": "npx eslint --fix "$TOOL_INPUT_FILE" 2>/dev/null || true",
            "timeout": 30
          }
        ]
      }
    ]
  }
}
Available Hook Events
| Event | Timing | Use Case |
|---|---|---|
PreToolUse |
Before tool execution | Validate inputs, modify or block actions |
PostToolUse |
After tool success | Lint, format, run tests |
UserPromptSubmit |
On user input | Template expansion, input filtering |
Notification |
Desktop notification | Completion alerts for long tasks |
SessionStart |
Session begins | Environment checks, initialization |
Claude Code supports many more lifecycle events beyond these — see the official Anthropic Hooks documentation for the full, up-to-date list.
Four Types of Hooks
command
Execute a shell script. The most common type — ideal for linters, formatters, and test runners.
http
POST to an external URL. Great for Slack notifications, logging, or webhook integrations.
prompt
Send a one-shot evaluation to the LLM. Useful for automated code reviews.
agent
Spawn a sub-agent for complex validation. A full Claude instance within your hook.
For even more powerful automation, check out our Claude Hooks Guide. Hooks let you enforce auto-formatting, security checks, and audit logging with guaranteed execution.
Technique 4 — Start with Plan Mode Before Writing Code ⭐ Basic
How to activate: Shift+Tab to toggle, or /plan, or claude --permission-mode plan
When you jump straight into code on a big task, you’re setting yourself up for rework. Plan mode is read-only — Claude analyzes the codebase and produces an implementation plan without touching anything.
💡 My rule
In my experience, jumping straight to implementation visibly increases the rework rate. Anything that touches multiple files, or that meddles with existing architecture, I run through Plan mode first — read the plan, tweak the parts that look off, then execute in normal mode. Since I adopted this habit, the “scrap everything and try a different approach” moments have essentially disappeared.
How to Use Plan Mode
- Press Shift+Tab twice to switch to Plan mode
- Describe your task: “I want to refactor the authentication module”
- Claude primarily uses read-only tools (Read / Grep / Glob, etc.) to analyze the code and can ask clarifying questions before presenting an implementation plan
- Review and refine the plan, then switch back to normal mode to execute
Edit the Plan Directly
Press Ctrl+G to open the plan in your external editor. Make changes, save, and Claude will proceed based on your revised plan.
Why Plan Mode Matters
Lower Cost
Read-only mode uses roughly half the tokens of normal mode
Better Exploration
Ideal for exploring unfamiliar codebases without risk
Team Review
Share the plan with your team before committing to an approach
Technique 5 — Iterate Safely with Fork & Rewind ⭐ Basic
How to use: Esc Esc (Rewind), /fork (Fork)
When Claude heads down the wrong path, you don’t have to throw everything away and start over. Rewind rolls back the conversation (and code changes) to any previous point. Fork creates a branch of the conversation so you can try a different approach without losing the original.
Rewind
- Press Esc twice to rewind to any previous message
- Code changes are also reverted along with the conversation
- The moment you think “that’s not right” — just hit Esc Esc
Fork
/fork [name]creates a branch of the current conversation- The original conversation stays intact while you try alternatives in the fork
- From the CLI:
claude --continue --fork-session - Forks are grouped under their parent in the
/resumesession list
In VS Code
Hover over any message to see “Fork conversation from here” and “Rewind code to here” options. A visual, intuitive way to branch and backtrack.
Technique 6 — Manage Context with /compact and /context ⭐ Basic
Commands: /compact [focus], /context, /cost
Long conversations eat up context fast, and when the context window fills up, Claude’s response quality degrades. Regular context maintenance is the single most impactful habit you can build.
/compact — Compress the Conversation
/compactsummarizes and compresses the entire conversation/compact focus on auth modulelets you specify what to prioritize in the summary- CLAUDE.md content is re-loaded after compression (it’s never lost)
- Auto-compact kicks in at 95% context usage (configurable via
CLAUDE_AUTOCOMPACT_PCT_OVERRIDE)
💡 My workflow
I leave auto-compact on and barely ever run /compact manually anymore. Since Opus 4.8’s 1M context window became available, my compaction frequency has dropped noticeably — a single session can stretch for hours without manual intervention. Back when the window was smaller I’d hit it with focused /compact calls whenever things felt sluggish; now I let the automation handle it and reserve focused compaction for genuinely messy sessions.
/context — Visualize Context Usage
Displays a color-coded grid showing what’s consuming your context window. You can immediately see what’s eating up space and get optimization suggestions.
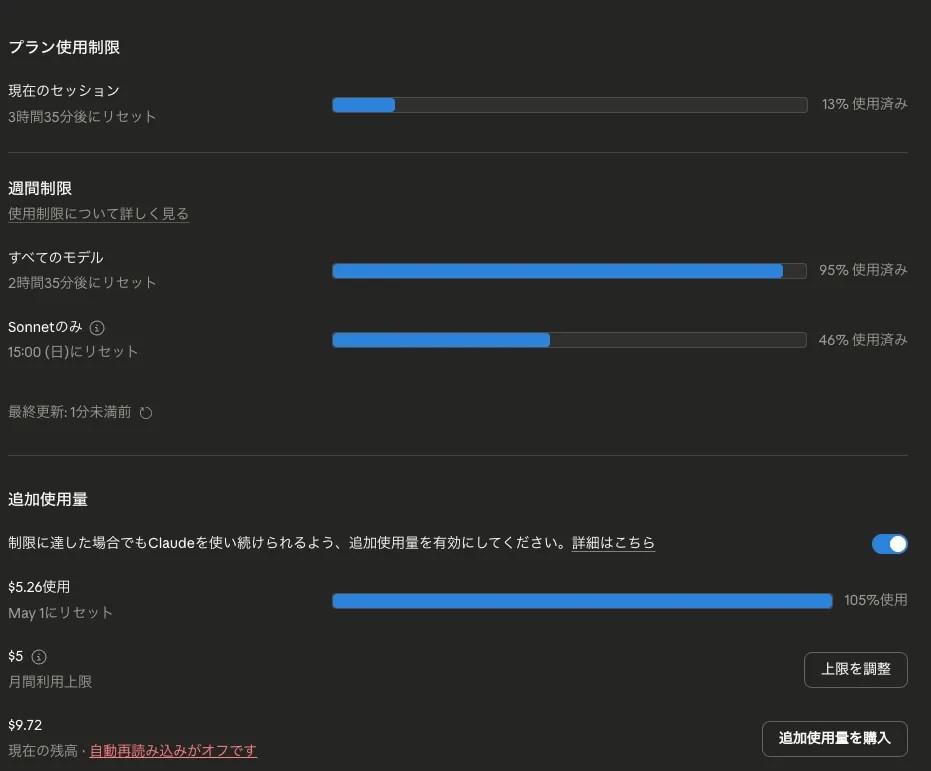
🔍 The Top 3 context hogs
- ① Reading large files whole — a few 1,000+ line
Readcalls can burn tens of thousands of tokens. Prefer Grep or range-limited reads (offset/limit) - ② Long conversation history — accumulated tool output (test results, build logs) gets heavy fast. When the task changes, cut the thread with
/clearor/compact - ③ Not delegating to sub-agents — running wide research directly in the main agent explodes history. Hand it to Explore, get only the summary back, and keep your main context clean
/cost — Check Token Spend
Shows token usage and estimated cost for the current session. You can also display this in the status line for real-time visibility.
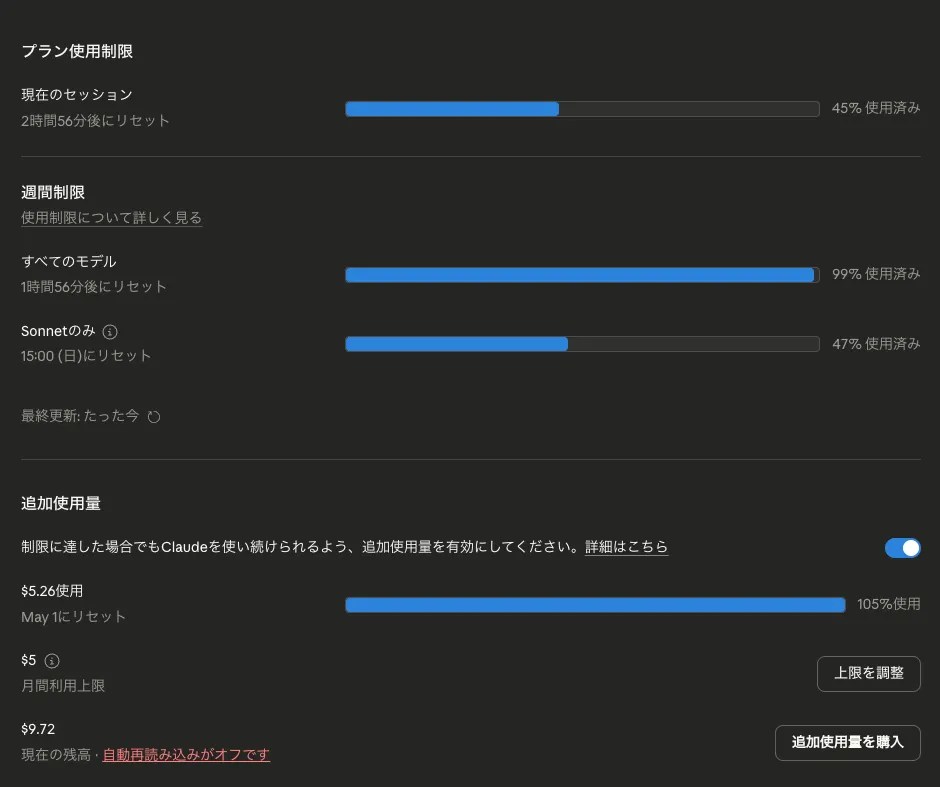
⚠️ Heads-up for subscription users: The dollar figure /cost shows is a pay-as-you-go API estimate. On Max / Pro plans, treat it as a usage indicator rather than a real billing number. For subscribers, /stats is the more accurate view of how much of your allotment you’ve consumed.
Context Conservation Tips
- Keep the always-loaded CLAUDE.md base around 200 lines, and split anything beyond into
.claude/rules/or Skills - Move specialized instructions into Skills (loaded only when needed)
- Delegate research tasks to sub-agents (only a summary returns to main context)
- Use
/clearfor a full reset when switching tasks - Use
/effort lowto reduce thinking tokens for lightweight tasks
Technique 7 — Run Parallel Research with Sub-Agents ⭐⭐ Intermediate
How it works: Claude uses sub-agents automatically, or you can define custom agents
Sub-agents operate in their own context window and return only a summary to the main conversation. This means you can explore large codebases in parallel without blowing up your context. For the full spec, see Anthropic’s official Subagents documentation.
💡 Why sub-agents are indispensable in my workflow
Sub-agent delegation is the single most impactful habit in my daily use. The contexts stay isolated so they don’t pollute each other, the main context only sees the summary, saving massive amounts of tokens, and running multiple in parallel boosts both speed and accuracy at the same time. On a workflow that consumes 1M+ tokens per day, the main agent wouldn’t survive a few hours without sub-agents picking up the heavy research work.
Beyond Claude Code’s sub-agents, Claude also offers desktop-level autonomous features — Dispatch, Computer Use, /loop, and Channels — for automating tasks beyond development. See Claude’s autonomous agent feature guide (Dispatch, Computer Use, Loop & Channels) for the full picture.
Built-in Sub-Agents
| Agent | Model | Access | Best For |
|---|---|---|---|
| Explore | Haiku | Read-only | Fast codebase search |
| Plan | Inherits parent | Read-only | Implementation planning |
| General-purpose | Inherits parent | All tools | Complex multi-step tasks |
Creating Custom Sub-Agents
Config file: <project>/.claude/agents/<name>.md or ~/.claude/agents/<name>.md
---
name: code-reviewer
description: Automatically reviews code changes. Used proactively.
tools: Read, Grep, Glob
model: haiku
background: true
---
Review the provided code changes for:
1. Potential bugs
2. Performance issues
3. Security risks
Custom agent options
model: haiku— run cheaply (perfect for exploration agents)background: true— run in the backgroundisolation: worktree— use an independent working copymemory: project— persist memory between sessions
Context Efficiency
Sub-agent results return to the main context as a ~720-token summary — a 95% reduction compared to running the same tools directly. Up to 7 sub-agents can run concurrently.
These sub-agent techniques work across different development environments. If you’re still deciding which editor to pair with Claude Code, our AI Code Editor Comparison covers how each option integrates with CLI-based agents.
Technique 8 — Run Routine Tasks with Custom Commands ⭐⭐ Intermediate
Config file: <project>/.claude/commands/<name>.md (project) or ~/.claude/commands/<name>.md (personal)
If you’re typing the same prompt more than twice, it should be a command. (Wondering how Claude Code compares to alternatives like OpenAI’s Codex for this kind of automation? See our Claude Code vs Codex comparison.) Create a markdown file, and invoke it with /<name>. You can even pass arguments via $ARGUMENTS.
💡 My usage pattern
Anything I do weekly or daily becomes a custom command — article drafting, SEO checks, image conversion, WordPress draft posting, etc. The biggest win isn’t speed, it’s that I no longer have to remember the procedure. Combine this with Skills (next technique) and the compounding effect is enormous.
Example — Commit Message Generator
Create .claude/commands/commit-msg.md:
Review the output of git diff --staged and generate a commit message following these rules:
- Line 1: Summary of the change (50 chars or less)
- Line 2: Blank
- Line 3+: Detailed description of what changed and why
$ARGUMENTS
Now you can run:
/commit-msg— generate a commit message/commit-msg include context about the bug fix— pass additional instructions
Dynamic Context Injection
Use the !`shell command` syntax to inject shell command output directly into your prompt:
Review the changes on this branch and generate a PR description.

Changes since main:
!`git diff main...HEAD`
The shell command output is expanded before the prompt is sent to Claude.
Technique 9 — Automate Complex Workflows with Custom Skills ⭐⭐ Intermediate
Config file: <project>/.claude/skills/<name>/SKILL.md (project) or ~/.claude/skills/<name>/SKILL.md (personal)
Skills are the next level up from Commands. With YAML frontmatter, you can restrict which tools a skill can use, specify the model, control execution context, and even let Claude invoke the skill automatically based on context.
Example — Test Generator Skill
Create .claude/skills/create-test/SKILL.md:
---
name: create-test
description: Creates unit tests for a specified file. Used for test-related instructions.
allowed-tools:
  - Read
  - Grep
  - Glob
  - Write
  - Bash
model: sonnet
---
Create unit tests for the file specified in $ARGUMENTS.

Rules:
- Test framework: Jest
- Test file location: __tests__/<original-filename>.test.ts
- Coverage target: major paths and edge cases
- Minimal mocking (external dependencies only)
Use it manually with /create-test src/auth/login.ts, or just say “write tests for login.ts” and Claude will invoke the skill automatically.
Commands vs. Skills
| Feature | Command | Skill |
|---|---|---|
| File location | .claude/commands/<name>.md |
.claude/skills/<name>/SKILL.md |
| Content | Prompt template only | YAML frontmatter + prompt |
| Invocation | Manual only (/name) |
Manual + auto-invocation by Claude |
| Tool restriction | No | Yes (allowed-tools) |
| Model selection | No | Yes (model) |
| Forked execution | No | Yes (context: fork) |
Bottom line: if you’re starting fresh, go straight to Skills.
Anything a Command can do, a Skill can do better. The auto-invocation, tool restrictions, and model pinning unique to Skills will pay off as your project grows. I’ve standardized on Skills for all new automation — my code-review workflow now lives as a SKILL.md that I can trigger much like /simplify.
Built-in Skills
/batch— parallel bulk changes across dozens of files (worktree + agents, with PR creation)/simplify— code quality review + auto-fix (3 review agents running in parallel)/commit— analyzes the diff and generates a commit message/pr-comments— fetches and displays GitHub PR comments
Technique 10 — Optimize Cost with Model Switching ⭐ Basic
Commands: /model, /effort, /fast
Not every task needs Opus. Match the model to the task difficulty and you’ll cut costs dramatically without sacrificing quality where it matters.
Choosing the Right Model
| Model | Strengths | Best For | Cost |
|---|---|---|---|
| Opus 4.8 | Highest quality reasoning | Complex architecture, large refactors | High |
| Sonnet 4.6 | Balanced speed & quality | Day-to-day coding, bug fixes | ~1/5 of Opus (API unit price) |
| Haiku 4.5 | Fast, very low cost | Simple questions, code search | ~1/30 of Opus (API unit price) |
Source: Anthropic API pricing page (per-token unit prices as of June 2026. Subscription plans such as Max / Pro use flat monthly fees and do not map directly to these ratios).
/effort — Adjust Thinking Depth
/effort low— lightweight tasks, saves thinking tokens/effort high— complex tasks requiring deep reasoning/effort auto— Claude decides (default)- Include “ultrathink” in your prompt for maximum thinking on a single turn
Typical Cost Benchmarks
General benchmarks (from the official Anthropic Claude Code cost guide, June 2026)
- Average: ~$6/day per developer
- 90% of users spend less than $12/day
- Sonnet-focused workflow: ~$100-200/month
Source: Anthropic Claude Code cost guide. These are pay-as-you-go API estimates and do not reflect subscription (Max / Pro) flat-rate plans.
💡 My actual spend (Max 20x)
- Plan: Claude Max 20x (at the time I subscribed this was $200/month — check the current pricing page for the live number, as Anthropic has iterated on Max tiers)
- Usage: 6+ hours/day, Opus 4.8 as my daily driver
- Tokens: routinely 1M+ tokens per session
- Equivalent API spend: at this rate on Opus, pay-as-you-go API would easily land in the thousands of dollars per month — Max 20x is massively cheaper for my usage pattern
- Sonnet estimate (my experience): switching the same workload to Sonnet drops the effective cost to roughly a quarter in my own workflow — a subjective figure that combines API unit-price differences and per-turn thinking token savings. For tasks where quality can be compromised — mechanical refactors, formatting, first-pass research — I lean on Sonnet aggressively
I run Claude Code as my primary coding agent, so I keep Opus on by default. If cost is your constraint, use Sonnet as the workhorse and flip to Opus only when the task genuinely needs the extra horsepower.
Technique 11 — Pause & Resume with Session Management ⭐ Basic
Commands: claude -c, claude --resume, /resume, /rename
End of the day? Close the terminal. Tomorrow, pick up right where you left off. Sessions persist automatically and can be named for easy retrieval.
Resuming Sessions
claude -corclaude --continue— resume the most recent sessionclaude --resume [name]— resume a named session/resume— browse all sessions (P=preview, R=rename, B=filter by branch)
Naming Sessions
/rename auth-refactor— name the current sessionclaude -n auth-refactor— set the name at launch
PR-Linked Sessions
Use claude --from-pr 123 to resume a session linked to a specific pull request. Sessions are automatically linked when you create PRs through Claude Code.
Technique 12 — Share Files Instantly with @ References ⭐ Basic
Syntax: Type @filepath in your prompt
Skip the tedious “read this file” step. The @ syntax lets Claude read files directly from your prompt with tab-completion support.
@ Reference Types
| Syntax | What It Does |
|---|---|
@src/auth/login.ts |
Reference a single file |
@src/auth/ |
Reference an entire directory |
@src/auth/login.ts:10-50 |
Reference specific line range |
@server:resource |
Reference an MCP server resource |
Other Input Methods
- Drag & drop: Drop files directly into the terminal
- Ctrl+V: Paste screenshots or images (multimodal support)
- VS Code: Select text, right-click, and choose “Send to Claude Code”
Technique 13 — Experiment Safely with Worktrees ⭐⭐⭐ Advanced
Commands: claude --worktree feature-name or claude -w
Git worktrees give you an independent copy of your repository. Claude Code takes full advantage of this — experiment freely without polluting your main branch.
Using Worktree Sessions
claude -w— create a temporary worktree and start codingclaude --worktree auth-experiment— create a named worktree- If there are no changes, the worktree is cleaned up automatically on exit
- If changes exist, you’ll see the branch name and path for future reference
Worktrees in Sub-Agents
Set isolation: worktree in your custom agent definition and each agent gets its own working copy for truly parallel work. The /batch skill uses worktrees + agents internally to process files in parallel.
Technique 14 — Integrate into CI/CD with Headless Mode ⭐⭐⭐ Advanced
Commands: claude -p "prompt", --output-format json
Claude Code isn’t just an interactive tool. Headless mode lets you run it non-interactively, making it perfect for scripts, CI/CD pipelines, and automated workflows.
Basic Usage
# Run a one-shot prompt
claude -p "Analyze test coverage in src/auth/"

# Get structured JSON output
claude -p "Check package.json for dependency vulnerabilities" --output-format json

# Pipe input to Claude
git diff HEAD~1 | claude -p "Review this diff for potential issues"
CI/CD Use Cases
Automated PR Review
Trigger a code review on every pull request, with feedback posted as comments.
Security Scanning
Run security checks on every commit and flag potential vulnerabilities.
Coverage Analysis
Identify untested code paths and suggest where to add tests.
Doc Generation
Auto-generate or update documentation when source files change.
Output Formats
| Flag | Format | Best For |
|---|---|---|
--output-format text |
Plain text (default) | Human-readable output |
--output-format json |
Structured JSON | Automation and scripting |
--output-format stream-json |
Streaming JSON | Real-time processing |
Technique 15 — Large-Scale Refactoring with /batch ⭐⭐⭐ Advanced
Command: /batch instructions
Need to update 50 files with the same pattern? /batch analyzes the scope, splits the work into units, spins up independent agents in worktrees, and creates PRs for each batch.
Example
/batch Migrate all React components in src/ to use React 19's use() hookHere’s what happens:
- Claude analyzes the target files and breaks the work into 5-30 units
- Each unit gets its own agent working in a dedicated worktree
- Agents work in parallel on their assigned files
- When done, each agent creates a PR for review
/simplify — Code Review + Auto-Fix
/simplifyRuns three review agents in parallel:
- Reusability check — identifies duplicate code and abstraction opportunities
- Quality & bug check — catches logic errors and code smells
- Efficiency check — flags performance bottlenecks
Issues are automatically fixed where possible, or flagged for manual review.
Editor + CLI Agent Combo — My Actual Setup
I get asked a lot whether you should live entirely inside Claude Code. My answer is “treat your editor and your CLI agent as different tools with different roles.” Here’s how I combine them in practice.
Why I Switched from Windsurf to Claude Code
For a stretch of time, Windsurf was my primary editor. At that point Cascade was arguably the strongest agent experience in the AI editor space, so sticking with Windsurf was an easy call.
That changed the moment Claude Code’s agent accuracy clearly overtook Windsurf’s. Three things pushed me over the line:
- Plan mode + execution in one context — designing and implementing in the same session means dramatically less rework
- Parallel sub-agent exploration — investigating large codebases is an order of magnitude faster
- Persistent learning via CLAUDE.md and Skills — project rules get sharper the longer you use them
These days I use VS Code as my actual editor and keep Claude Code as my primary agent, letting in-editor assistants handle inline completions and micro-edits. That division of labor has become my default stack.
How I Split the Work
| Job | Tool | Why |
|---|---|---|
| Design, implementation, refactoring (primary) | Claude Code (main agent) | Plan mode, sub-agents, and Skills shine here |
| File browsing, diffs, line-level edits | VS Code itself | Better GUI and Git integration |
| Long-running batches, automated review | Claude Code sub-agents / /batch |
Parallelism translates directly to throughput |
| Routine flows (commits, PRs) | Custom Commands / Skills | Offloads procedural memory from the human |
💡 Measured impact: Since I settled into this combo, my perceived development speed has jumped by multiples, and projects that would have taken months of work now ship in weeks. Don’t marry a single tool — anchor on Claude Code as your agent, then pair it with whatever editor you love.
Bonus — Handy Tips and Shortcuts
Keyboard Shortcuts
| Shortcut | Action |
|---|---|
| Shift+Tab | Cycle through permission modes |
| Ctrl+G | Open prompt or plan in external editor |
| Ctrl+B | Send running task to background |
| Ctrl+R | Search command history |
| Ctrl+S | Stash current prompt input |
| Ctrl+V | Paste an image |
| Ctrl+O | Show detailed transcript (with thinking) |
| Esc Esc | Rewind conversation |
Useful Commands
| Command | What It Does |
|---|---|
/diff |
Interactively view uncommitted changes |
/doctor |
Diagnose installation and configuration issues |
/clear |
Reset context when switching tasks |
/export [filename] |
Export conversation to a text file |
/theme |
Switch themes (dark/light/accessible) |
/vim |
Enable Vim keybinding mode |
/color blue |
Change prompt bar color (useful for multiple sessions) |
/btw question |
Ask a side question without affecting main context |
/voice |
Voice input mode (hold spacebar to speak, 20+ languages) |
Customizing the Status Line
Use /statusline with natural language to customize what’s displayed: Git branch, context usage, cost, model name — all in real time at the bottom of your terminal.
Adoption Roadmap — Where to Start
“15 techniques is a lot — where do I actually start?” is the question I get most. Here’s the exact order I use when onboarding teammates. Don’t try to deploy all 15 on day one; stage it and each phase compounds on the last.
| Phase | Techniques | Goal |
|---|---|---|
| Day 1 | #1 (CLAUDE.md) / #2 (Permissions) / #4 (Plan mode) | Eliminate the repetitive explaining and approval prompts — the foundation |
| Week 1 | #3 (Hooks) / #5 (Fork/Rewind) / #6 (/compact & /context) / #12 (@ references) | Remove everyday friction and make long sessions comfortable |
| Month 1 | #7 (Sub-agents) / #8 (Commands) / #9 (Skills) / #10 (Model switching) / #11 (Sessions) | Balance cost and quality while turning repeated work into persistent automation |
| Month 3 | #13 (Worktrees) / #14 (Headless CI) / #15 (/batch) | Scale to large refactors and team-wide CI integration |
💡 My measured take: Day 1’s three techniques alone give you a ~30% speed boost. By the end of Week 1, Claude Code feels less like a tool and more like your baseline environment. Month 1’s automation phase — sub-agents + Skills — is where productivity really jumps.
FAQ — Claude Code Efficiency
▶What should I put in CLAUDE.md?
Start with /init to auto-generate a template. At minimum, include: your language/framework, test policies, commit message conventions, and project-specific rules. For inspiration, look at CLAUDE.md files in popular open-source repos.
▶I've allowed too many permissions — how do I stay safe?
deny rules always override allow. Start by denying dangerous operations, then layer your allow rules on top. Use /permissions to review your current ruleset. For a deep dive into recommended deny rules, see our Claude Code Security Settings Guide.
▶When should I use sub-agents?
- Good fit: Investigation tasks needing 3+ Grep/Glob calls, impact analysis across multiple directories, long-running tests or builds (background agents)
- Not needed: Reading a specific file, answering a simple question (sub-agents have overhead)
▶My context fills up too quickly — what can I do?
- Run
/compactregularly (every 2-3 hours as a guideline) - Delegate research to sub-agents (only summaries come back to main context)
- Separate CLAUDE.md and Skills to keep base context lightweight
- Use
/clearwhen switching tasks entirely - Max/Team/Enterprise plans offer 1M context (Opus 4.8)
▶Should I use a Command or a Skill?
- Simple prompt templates: Use a Command (quick and easy)
- Need tool restrictions, model selection, or auto-invocation: Use a Skill
- Future-proofing: Skills are the recommended path going forward — I’ve standardized all new automation on Skills
▶Should I switch from Cursor / Copilot to Claude Code?
My honest take: if you want an agent that can drive design and large-scale changes, yes — move your center of gravity to Claude Code. I switched from Windsurf the moment Claude Code’s agent accuracy clearly overtook it, and I haven’t looked back.
- Claude Code wins when: you need multi-file design & refactoring, long-running investigation and automation, or Plan mode / sub-agents
- Cursor / Windsurf wins when: you mostly want inline completions and chat-based micro-edits tightly coupled to the editor
- Hybrid (my recommendation): keep using VS Code or Cursor as your editor and run Claude Code as your primary agent. Best of both worlds
▶When introducing Claude Code to a team, what configs should I share first?
Three things, in priority order:
CLAUDE.md+.claude/rules/— the shared knowledge base. Commit and review like code.claude/settings.json— team-standardallow/denypermissions and hooks. Also committed- Add
.claude/settings.local.jsonto.gitignore— personal auto-allow rules and API keys never leave the individual machine
The most common failure mode in my experience is non-engineers getting stuck on setup. Engineers solve their own problems; PMs and designers need a setup doc and a simple troubleshooting guide to be productive from day one.
Wrapping Up
My recommendation: Start with CLAUDE.md, then work toward mastering Skills
Claude Code’s feature set keeps expanding, but you don’t need to learn everything at once. Begin with CLAUDE.md to eliminate repetitive instructions, then gradually adopt Skills for complex automation. When in doubt, build your config by chatting with AI — it works better than you’d expect.
Here’s the recommended progression:
- ⭐ Start here: CLAUDE.md, Permissions, Plan mode, Fork/Rewind, /compact — these alone will save you hours every week
- ⭐⭐ Level up: Hooks, Sub-agents, Custom Commands, and Skills — automate the patterns you’ve identified in your workflow
- ⭐⭐⭐ Go advanced: Worktrees, headless CI/CD integration, and /batch — for large-scale operations and team workflows
And don’t forget the security side of things. Pair this guide with our Claude Code Security Settings Guide to build a workflow that’s both productive and secure.
👉 Claude Code CLI vs Web vs Desktop — Which Version Should You Use?
👉 Claude Code Skills — The Complete Guide
![Harden Claude Code CLI: 9 Proven Steps for Business Use [2026]](https://i0.wp.com/devgent.org/wp-content/uploads/2026/03/claude-code-security-eyecatch.webp?fit=300%2C167&ssl=1)


Author
krona23
Over 20 years in the IT industry, serving as Division Head and CTO at multiple companies running large-scale web services in Japan. Experienced across Windows, iOS, Android, and web development. Currently focused on AI-native transformation. At DevGENT, sharing practical guides on AI code editors, automation tools, and LLMs in three languages.
📚 Related Articles


🔥 Most Popular
- Claude Desktop Won't Install? Windows & Mac Fixes That Worked (2026)
- Cursor Pricing 2026: Plans & Real Costs After 3 Years of Pro
- n8n vs Dify vs Zapier vs Make: Tested in Production (2026)
- How to Reduce Verbose Claude Code Comments with WHY Rules (2026)
- OpenAI Long-Horizon Model Safety: Trajectory Monitoring for Agents



Leave a Reply